How to configure PPPoE connection on Mac pro
This Article Applies to:
Step 1
Click the Apple menu then select System Preferences.

Step2
When the System Preferences screen appears, please go to the Internet &Wireless section and click Network.

Step 3
Under the Network screen, please select Ethernet. In the Configure IPV4 box, please select Create PPPoE Service.

Step 4:
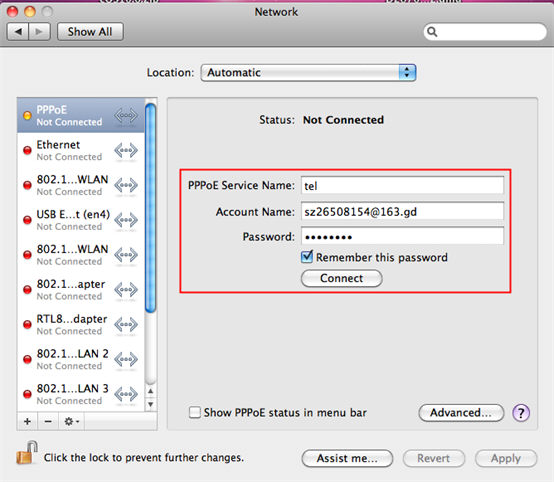
Please type the Service Name (This is optional, you should contact your ISP to confirm) and click Done.

Step 5:
Type the username and the password which are from your ISP, and then please click on Apply and Connect
If it is successful, you will see the IP address which is shown as below:

